Showing posts with label kim chee. Show all posts

Friday, August 03, 2007

Kim Chai Soup

How to survive San Francisco summers:


I call it Kim Chai because it's like a Thai coconut soup with Kim Chee in it. It's delicious and hearty, and most importantly, very simple to make. Let's get started:

WHAT YOU WILL NEED:

  1. Vegetables. I like to use carrots, snap or snow peas, mushrooms, onions and corn.
  2. Lemongrass and fresh ginger root. Supermarkets sell lemongrass by the stalk.
  3. Coconut milk (It's high in fat so the Lite milk works just as well and you won't feel as guilty)
  4. Stock. Chicken or vegetable; choose your poison.
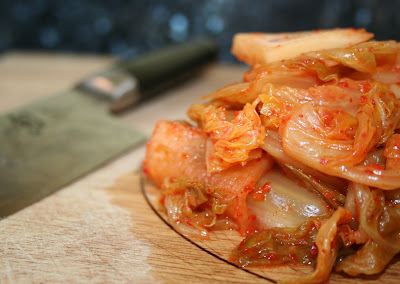
  5. KIM CHEE of course. In my local Safeway, it's sold right next to the gyoza wrappers. I always try to buy the hottest jar but you should use what is right for you. My mom actually washes hers off in the sink (hello, what's the point?).
  6. Chicken breasts. Although you could use shrimp too -- I don't see why not.

GET STARTED:

  1. Chop up your chicken, add salt and pepper, and saute it in a pan. Once it starts to brown I put a little chicken stock in it and cover the pan to continue cooking it without drying it out and turn it off while it's cooked enough.
  2. Meanwhile, chop up your vegetables in bite size pieces. Last thing you want to do is wrestle with large pieces while eating soup because it just splashes on your shirt every time.
  3. Rough chop the Kim Chee. Most of the pieces will already be small.
  4. Chop your lemongrass in a few pieces. The fresh cuts allow more flavor to come out but it's not chewable so you want to be able to fish it out before serving. Same as the ginger. (see pic)
  5. Get your soup pot hot and start sauteing your onions. Once they're going well enough, just throw everything else in. It will look like this messy crap below but just wait ...

Once everything seems like it's pretty cooked up together (3-4 minutes), pour in your chicken stock and let the soup start to simmer. After a few more minutes pour in the coconut milk. Your soup should now be a creamy, semi-opaque broth.


Throw in the chicken and let it finish off with the soup. Taste your soup and season it to taste. It should be spicy and salty with the flavors of ginger and lemongrass running rampant.

BOOYAH - You're done. I told you it was simple.


Thursday, July 12, 2007

Kim Chee Gyoza

Oh Me So Yummy ...

Kim Chee Gyoza are one of my favorite things to eat. While they can be labor intensive, they're really good and your friends will beg you to make them. Plus, it's really important to master the art of the dumpling because there is SO much you can do with a mix of ingredients and a dough wrapper. Let's get started.

WHAT YOU WILL NEED:

  1. Gyoza wrappers - grocery stores and Asian markets have them. At my local Safeway they are with the tofu.
  2. A whole big jar of Kim Chee. The spicier the better.
  3. A few cloves of garlic, a big piece of ginger, salt, pepper, and green onions.
  4. Mince everything up as small as possible or use a food blender if you have a good one. One thing that makes life easier is to use garlic and ginger paste from the Japanese market if you can find it. That way you get more flavor for less work.
  5. Before you mix in the egg: taste your mix! You'll want to know if it needs salt, pepper, garlic, etc. before it's too late.
  6. Mix an egg yolk with corn starch to use as a binding agent for your mix. What you don't want is too much liquid. The egg and kim chee make that difficult to prevent so once everything is mixed, squeeze out liquid or push through a mesh strainer if you can.

Your mix should look like this:


HOW TO WRAP YOUR GYOZA:

  1. Take a small cereal spoon and dig out some mix. Place it in the center of your wrapper.
  2. If you overfill it you will know because it will squeeze out all over the sides. Don't worry, have fun, and know that there is a learning curve to getting your gyoza wrapped well.
  3. Have a little dish of water ready because you're going to need to wet the edges slightly so the dough seals together. (See first pic)
  4. Fold your gyoza in half and slightly pinch the edges over, folding from the right to the left. Like a fan. It's a simple technique but it takes getting used to.
  5. Pinch the edges tight so they really stick together.
  6. And that's it. Place them separately on plates or pans that will fit in your freezer. If you throw them into a hot pan as-is they will stick to each other and get ripped in the pan. Let them freeze / harden.
  7. Your little gyoza army will give you a proud sense of accomplishment!

HOW TO COOK:
Heat up a frying pan on medium heat and put in a little oil once it's hot. Maybe 1 tablespoon. Throw in the gyoza so each one has a little space to move around and cook until browned. Then put in a 1/4 cup of water -- it will sizzle and a bunch of steam will rise up. Put the lid on it ASAP and don't let the steam out. Turn your fire down to low and let the gyoza steam until the water is gone, or about 15 minutes.

WHAT TO SERVE IT WITH:

I make the same sauce for all gyoza, homemade or store-bought. Some ingredients suggestions: soy sauce, seasoned rice vinegar, black-bean sauce, chili oil, chopped green onions, chili-garlic sauce, a tiny bit of sesame oil (sesame oil is a strong flavor so you will overpower your sauce if you use too much). Once you've made your sauce, plate it with your gyoza and -- BOOYAH. You're done.